Before you begin
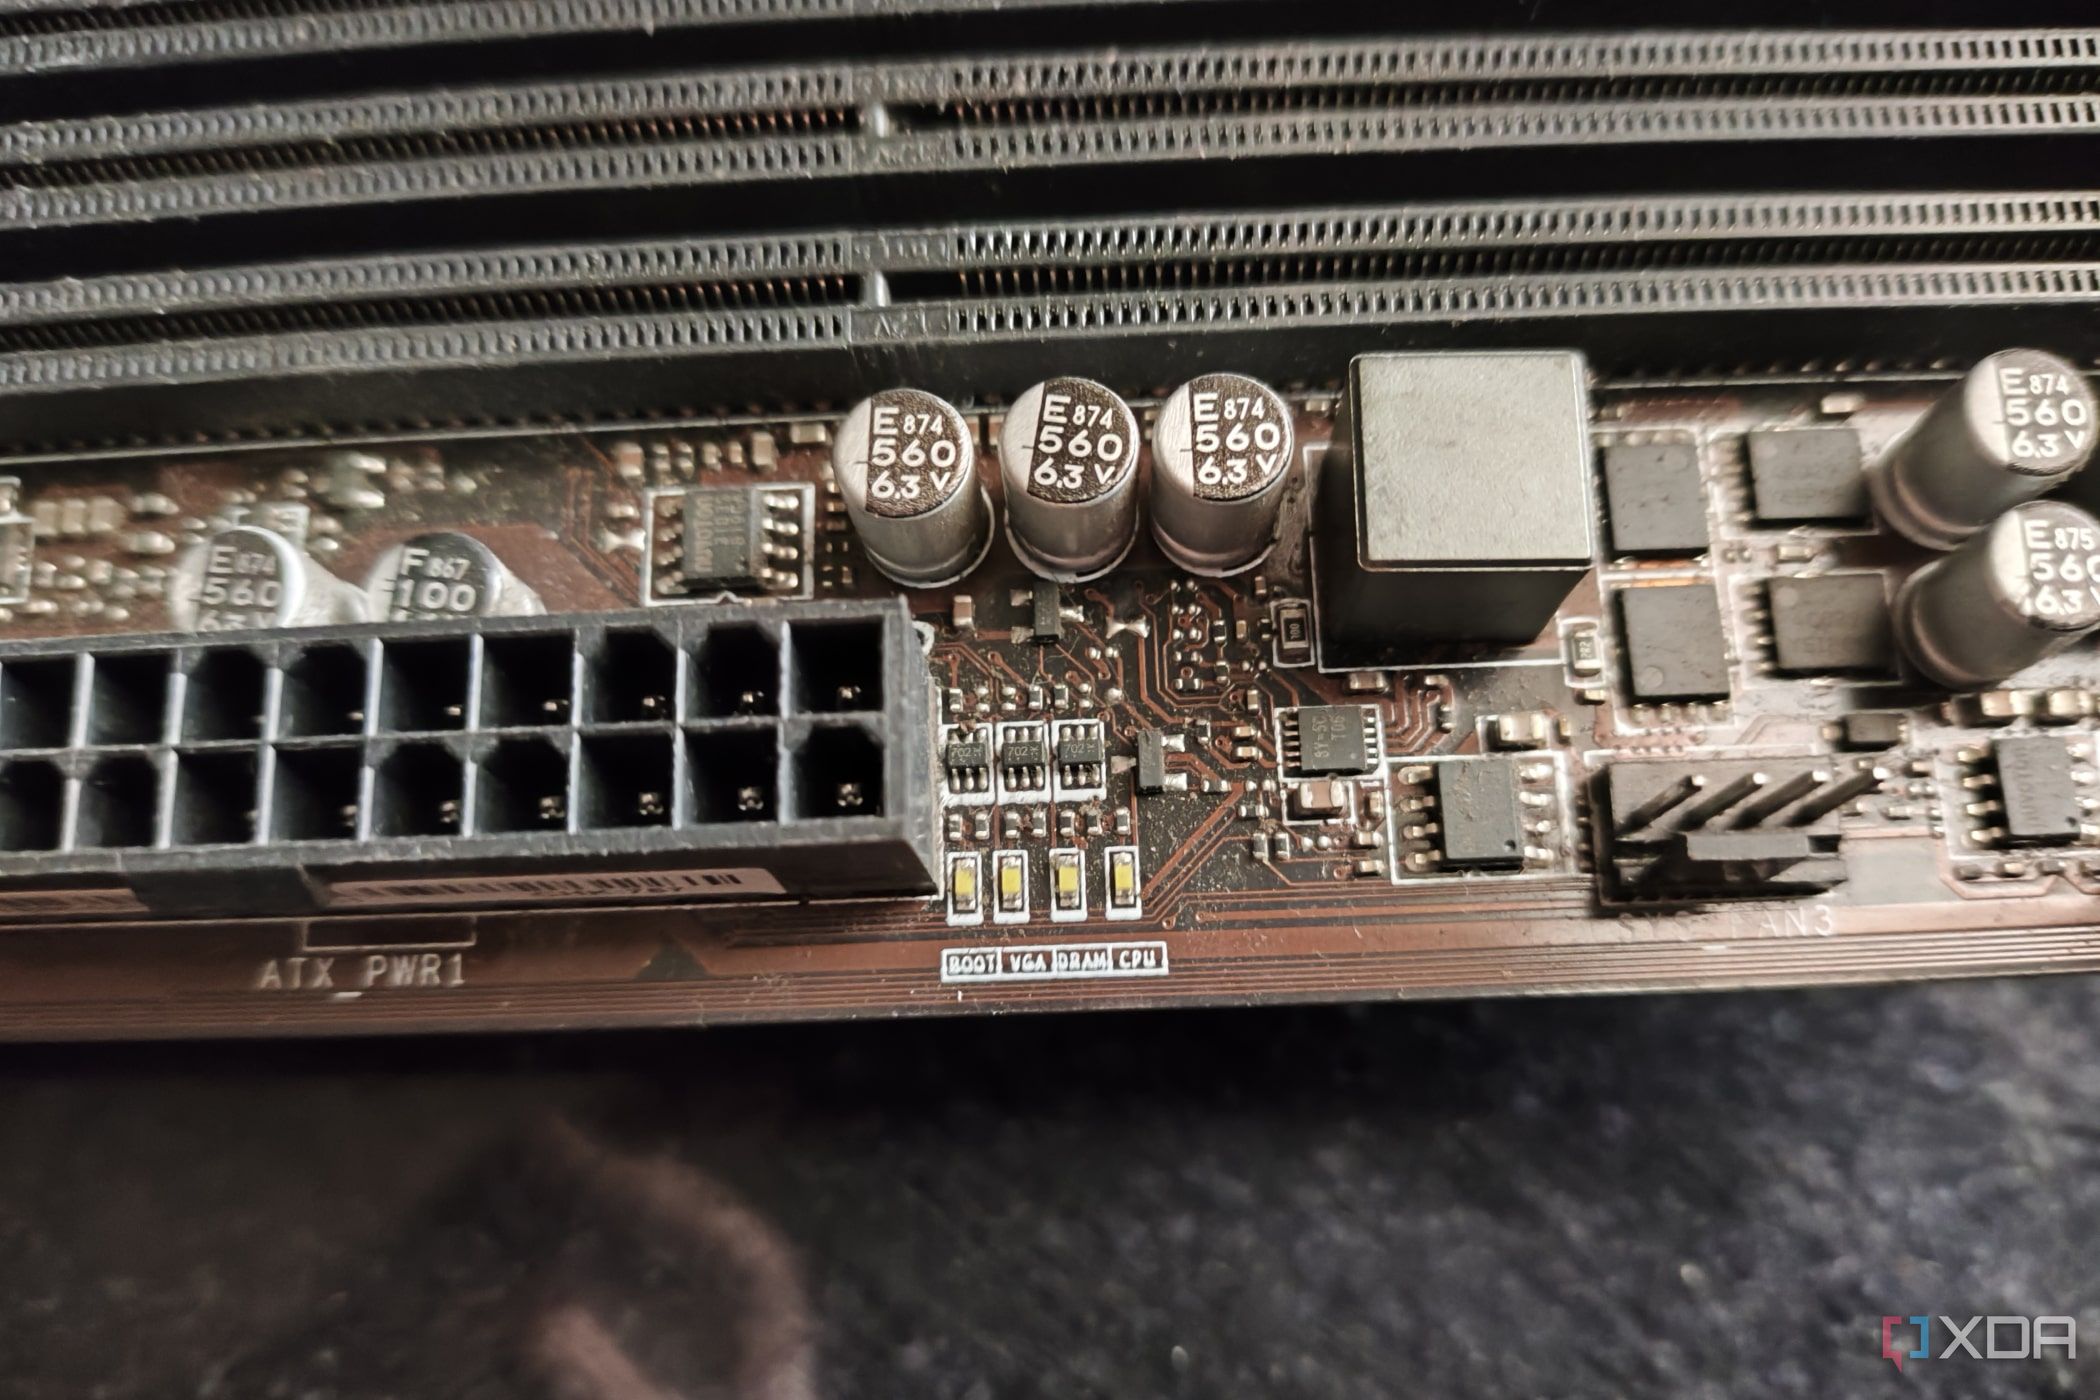
Before you resort to extreme measures like flashing the GPU firmware, you should follow some preliminary fixes. For a new GPU, double-check that you have installed it properly before ensuring there’s not too much sag. If your motherboard is equipped with debug LEDs, check whether the GPU indicator is glowing on startup.
Many high-end graphics cards require three 6+2-pin connectors from the PSU, and it’s a good idea to use three separate cables to avoid running into issues with power delivery. Even if your PSU doesn’t include three separate cables for powering up the GPU, make sure you don’t daisy-chain three 6+2-pin headers from the same cable.
Additionally, you should try replugging the DisplayPort/HDMI cables into different GPU and monitor slots, as there could be some issues with the ports. Be sure to check whether the display cable is at fault by replacing it with a different one. After you’ve ensured all the connections work well, it’s time to proceed with the rest of the fixes.
Switch to onboard graphics
Since the GPU is not working, you’ll need to look for an alternate way to send the display signals to the monitor. If you’re rocking an APU, you can use the processor’s integrated graphics to boot into your system. This will allow you to diagnose the graphics card problem and, more importantly, use the computer.
- Unplug the video cable from the GPU and connect it to your motherboard.

- Keep tapping the Delete key during the boot sequence to enter the BIOS.
- Look for the option to enable integrated graphics in the Advanced Settings section. On most motherboards, it should be named Initiate Graphic Adapter or Internal Graphics.
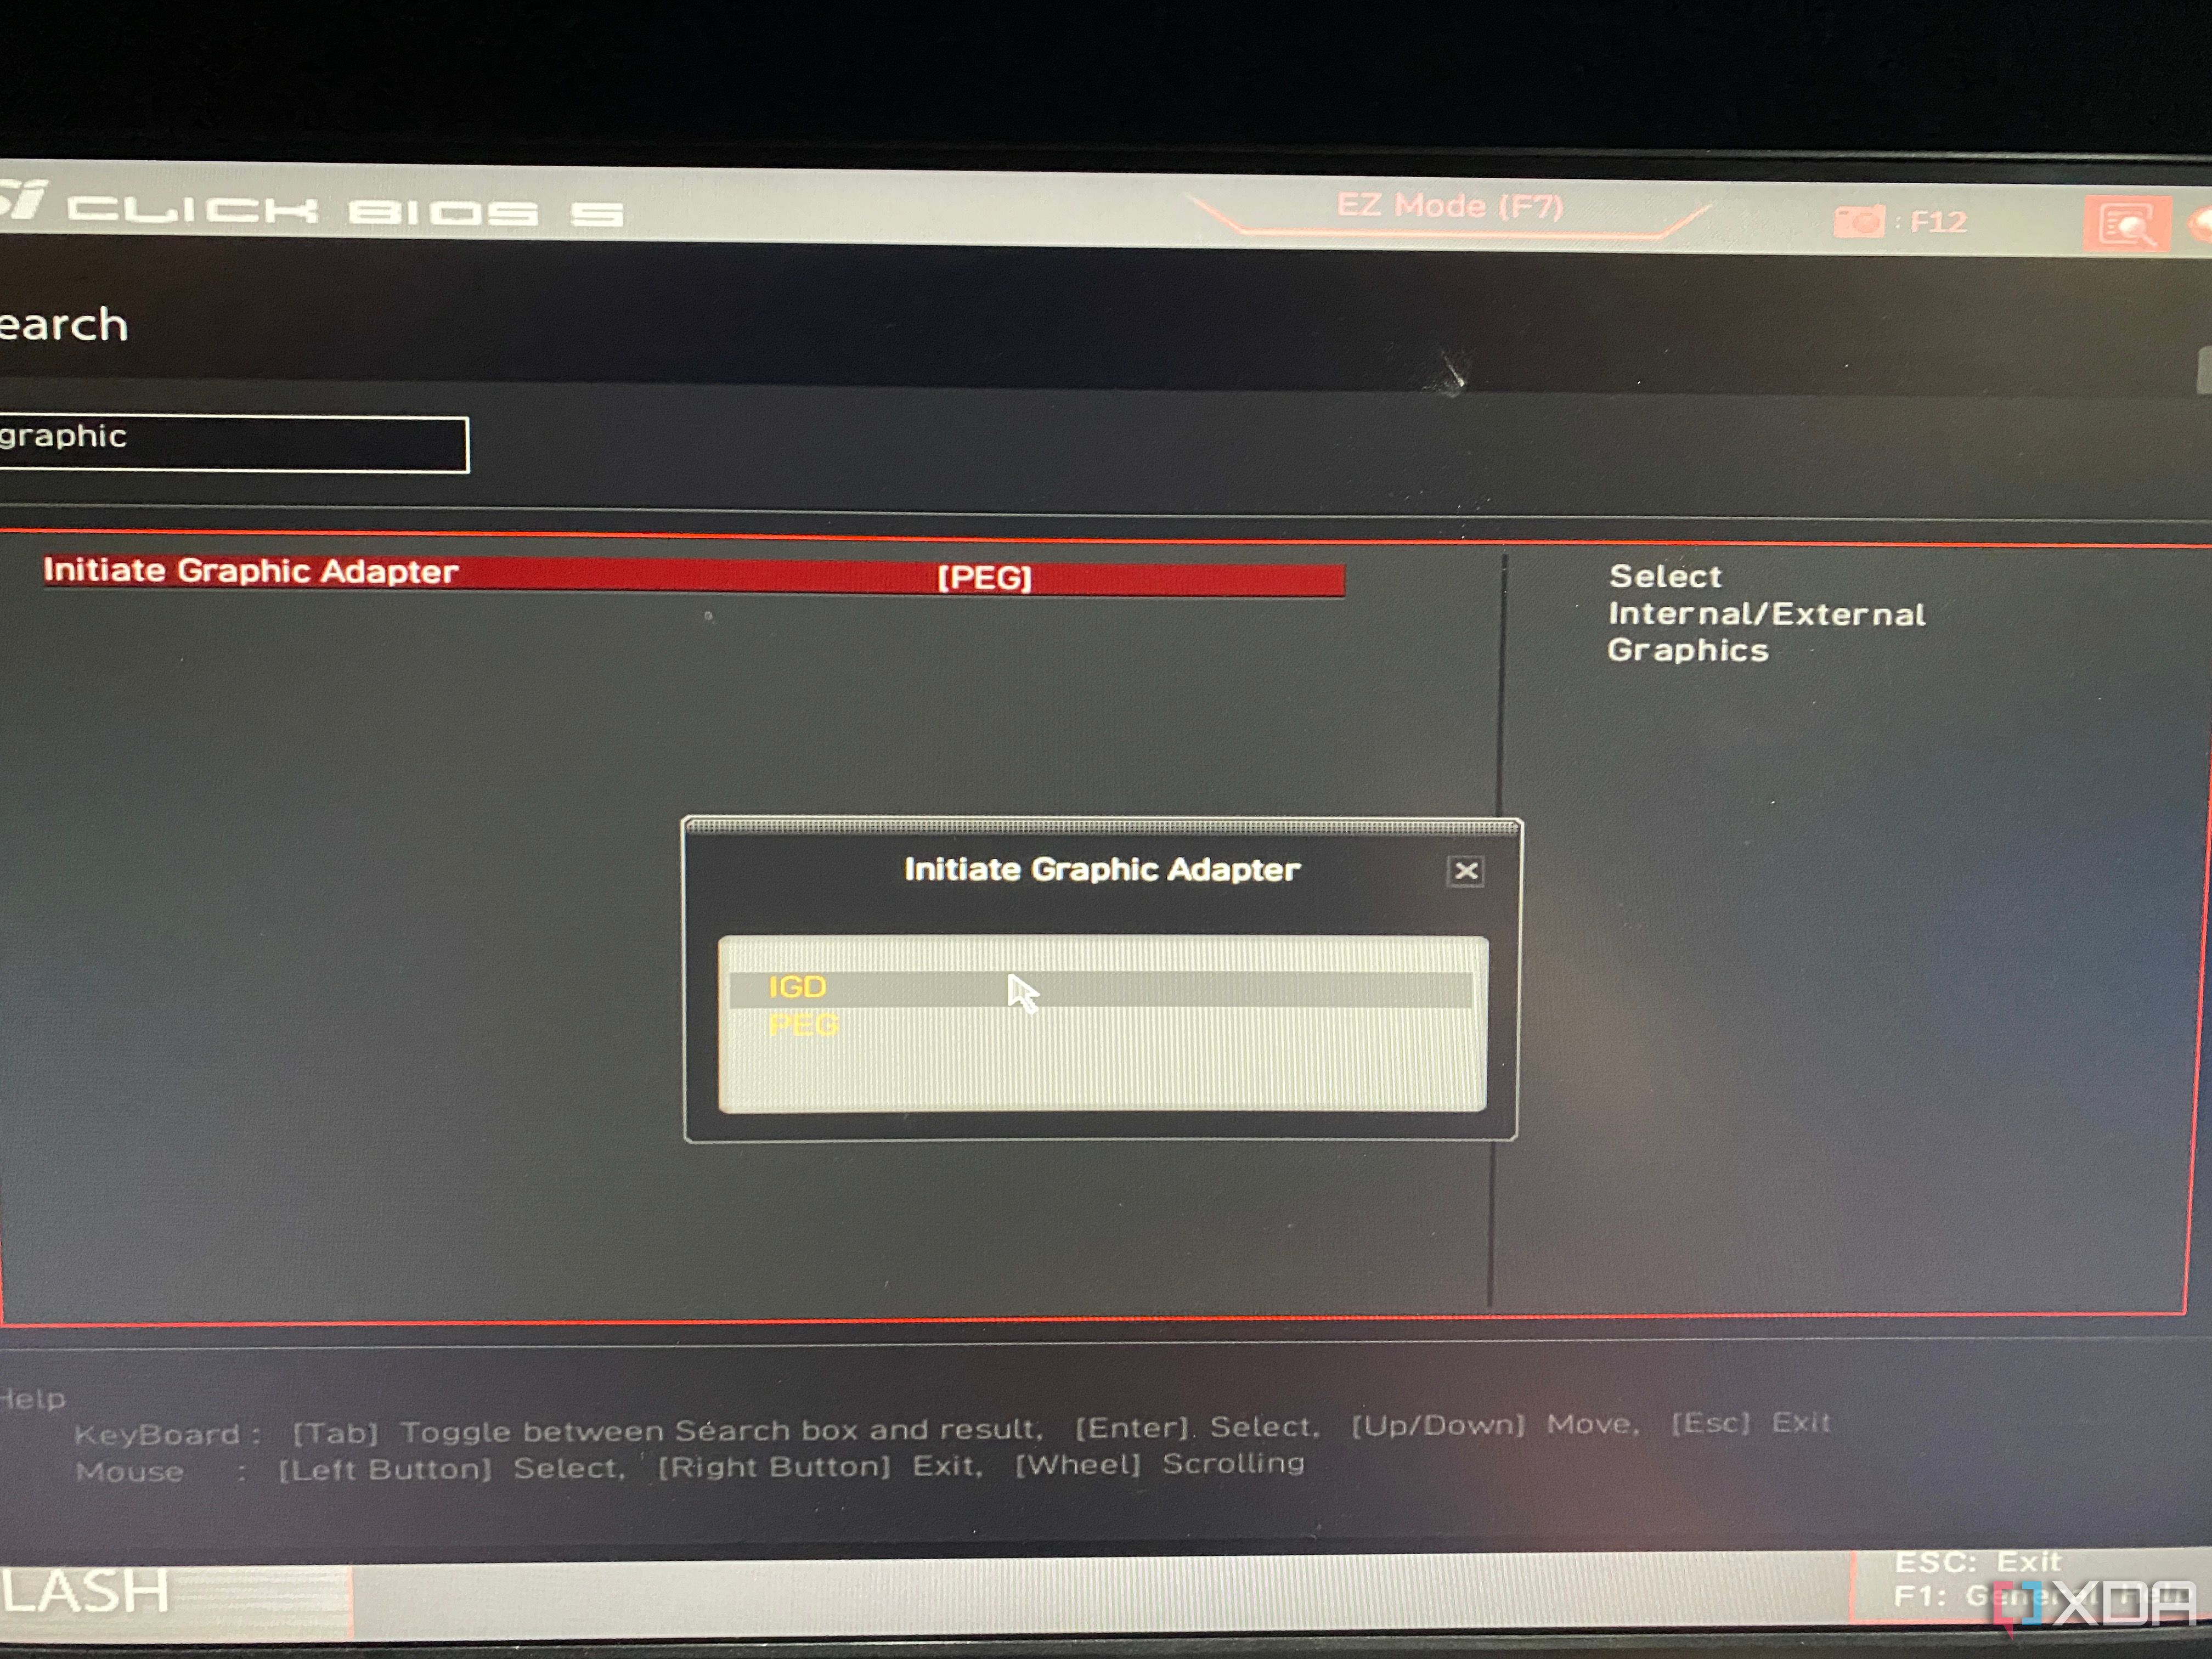
- Save the new profile and exit the BIOS settings.
Alternatively, if you have a secondary GPU, you can use it to boot up your system and troubleshoot for errors.
Reinstall the GPUs drivers
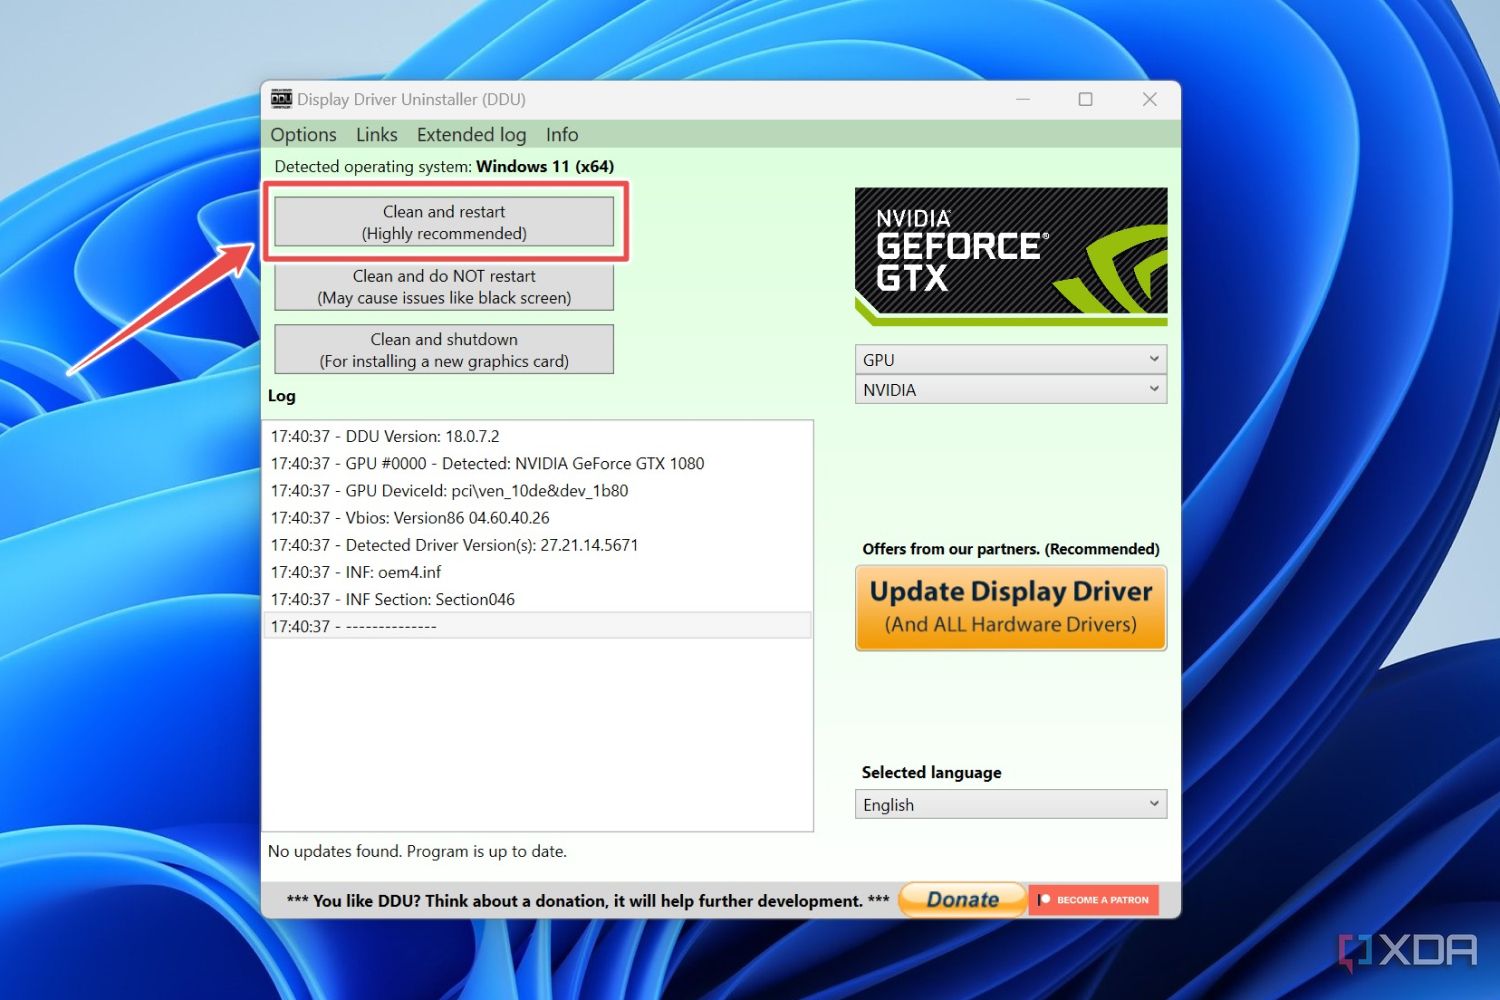
In some cases, your old GPU drivers could be corrupted, so you’ll need to reinstall them. The Display Driver Uninstaller (DDU) is a fantastic tool that lets you remove all traces of the old display drivers, thus preventing you from running into compatibility errors when installing up-to-date drivers.
- Download DDU from this link.
- Unzip the folder you just downloaded before double-clicking on the DDU application file and extracting it.
- Run the DisplayDriverUninstaller.exe file with administrator privileges.
- Click on the Select Display Type box and choose GPU.
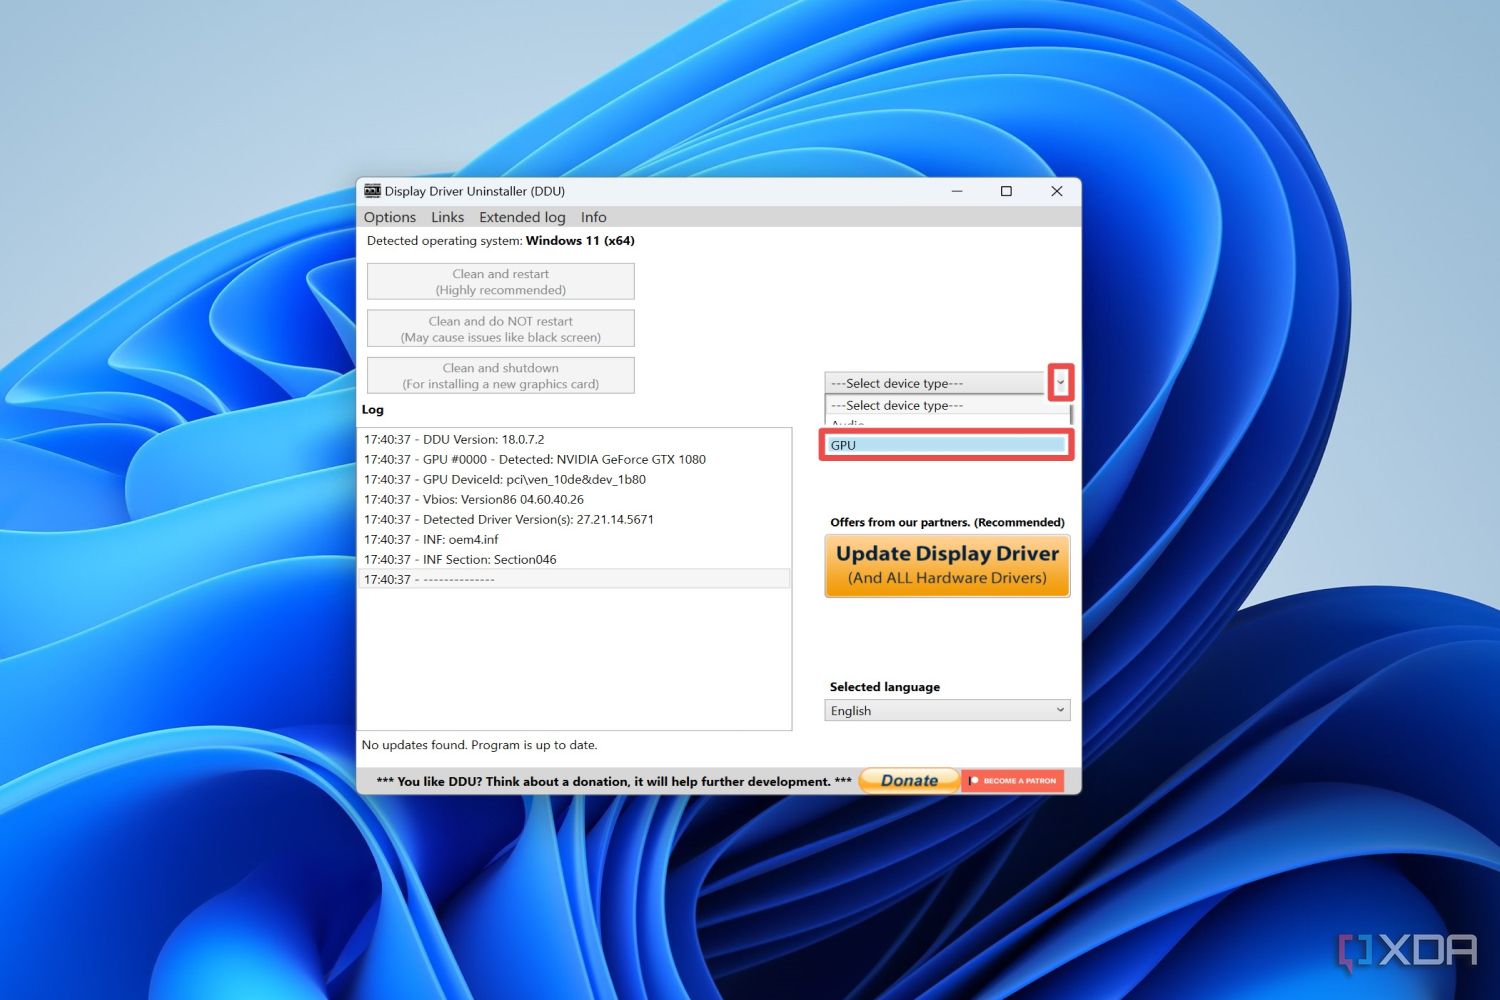 If you’ve used another GPU instead of the integrated graphics, make sure you don’t accidentally select it.
 - Choose the Clean and restart option to delete the old drivers.
- Once your PC starts up, you can download the latest drivers from your GPU manufacturer’s website.
Flash GPU VBIOS
If your GPU suddenly stops working and no other fix seems to work, you can try to salvage it by flashing the latest VBIOS.
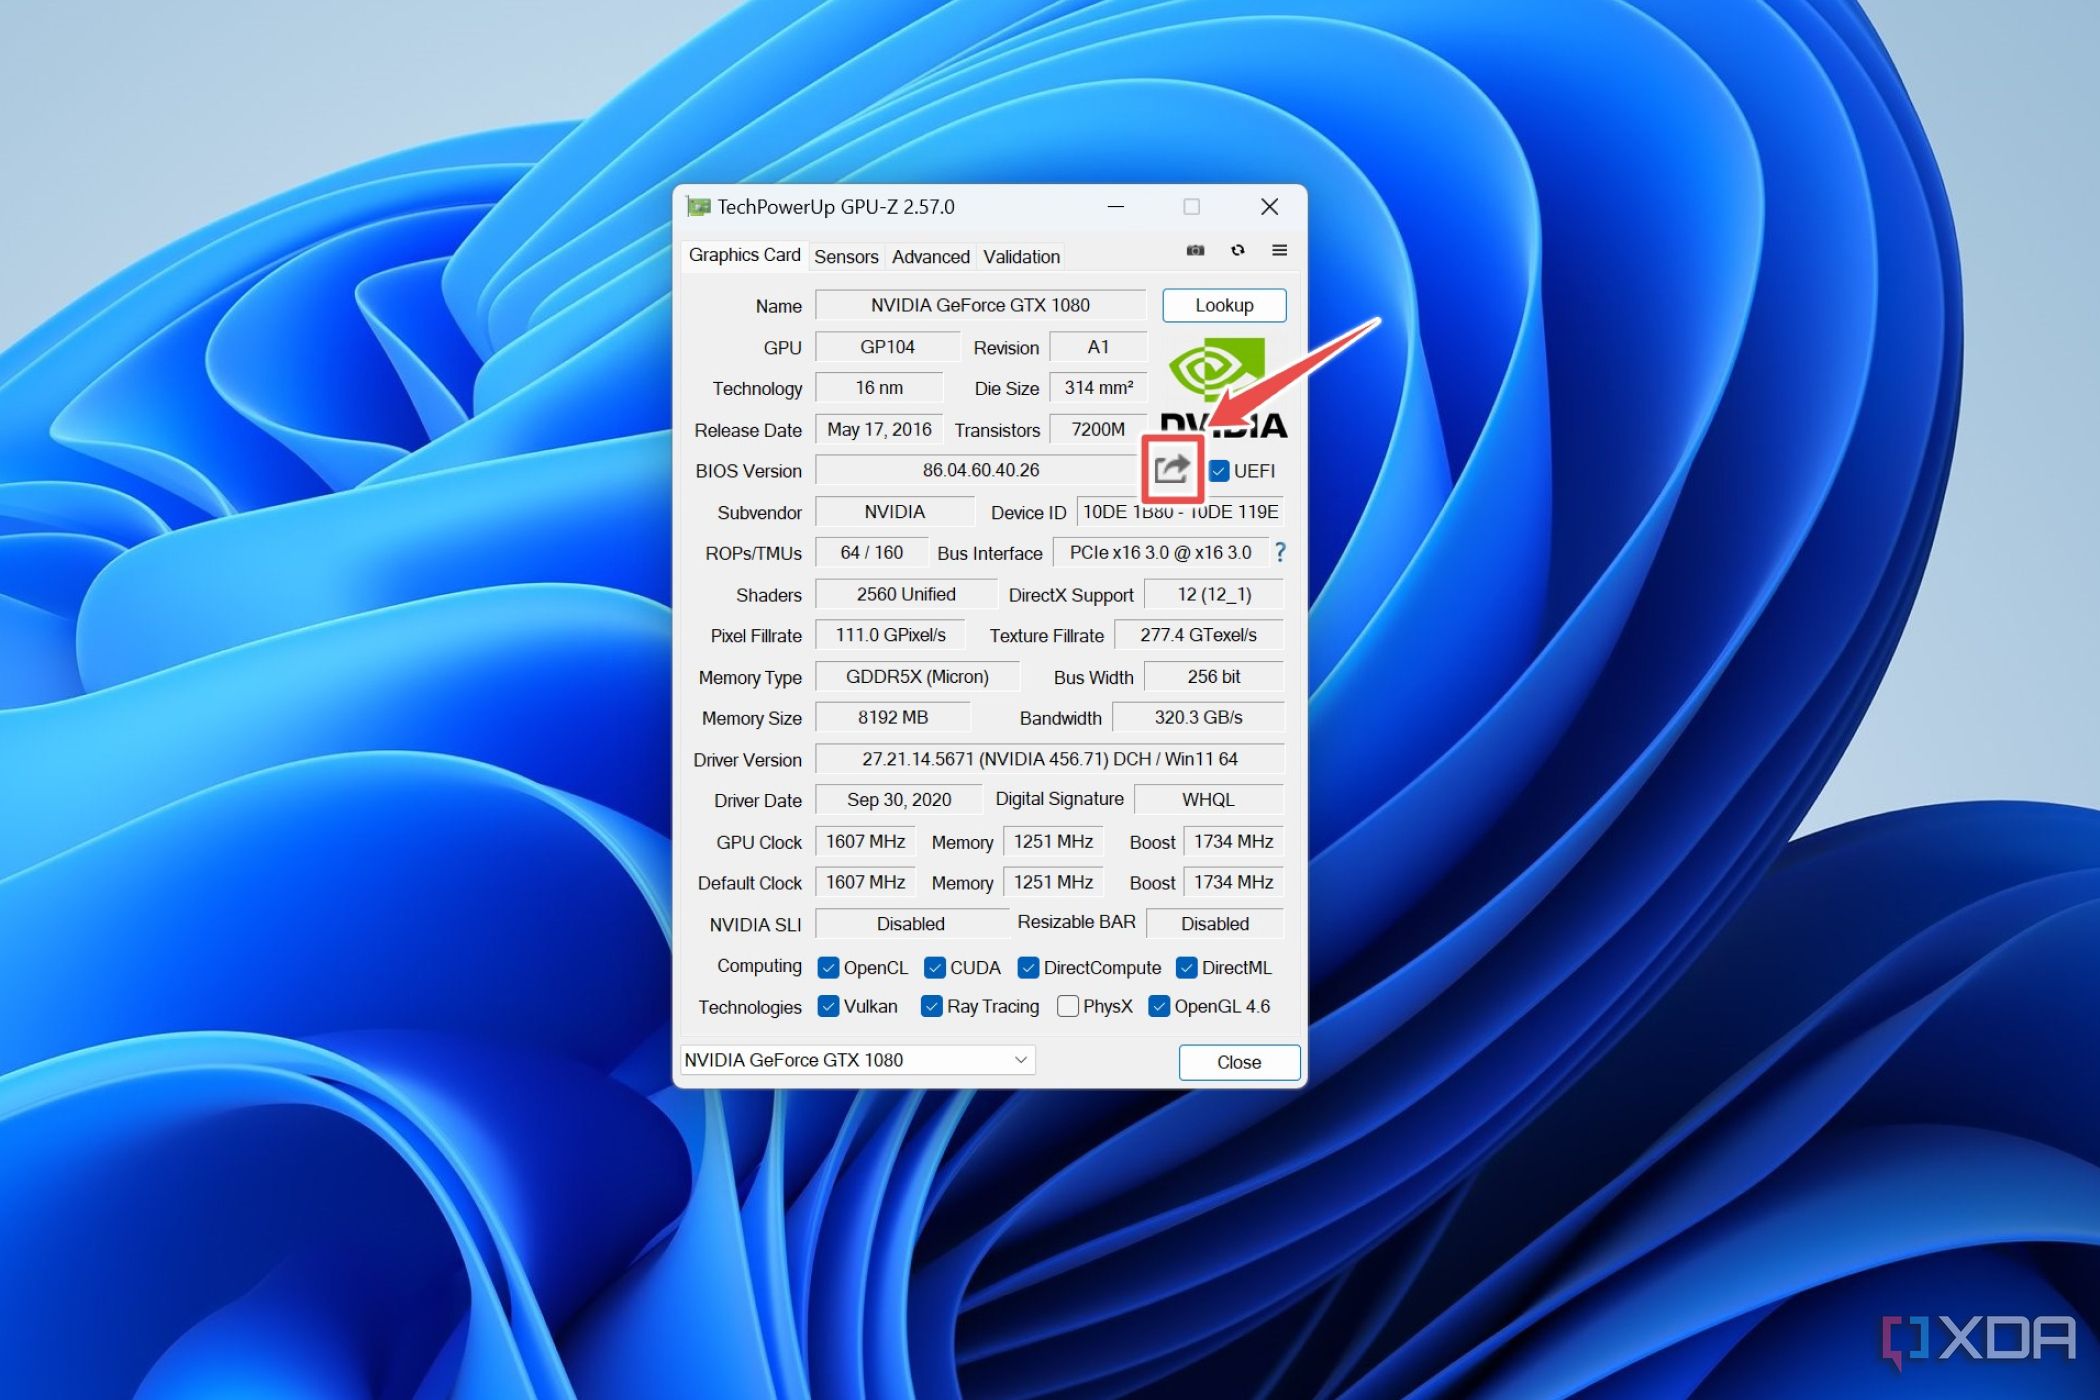
- Download the GPU-Z utility from TechPowerUP and run its executable file as an administrator.
- (Optional) Save the current version of the BIOS by clicking on the Save BIOS button.
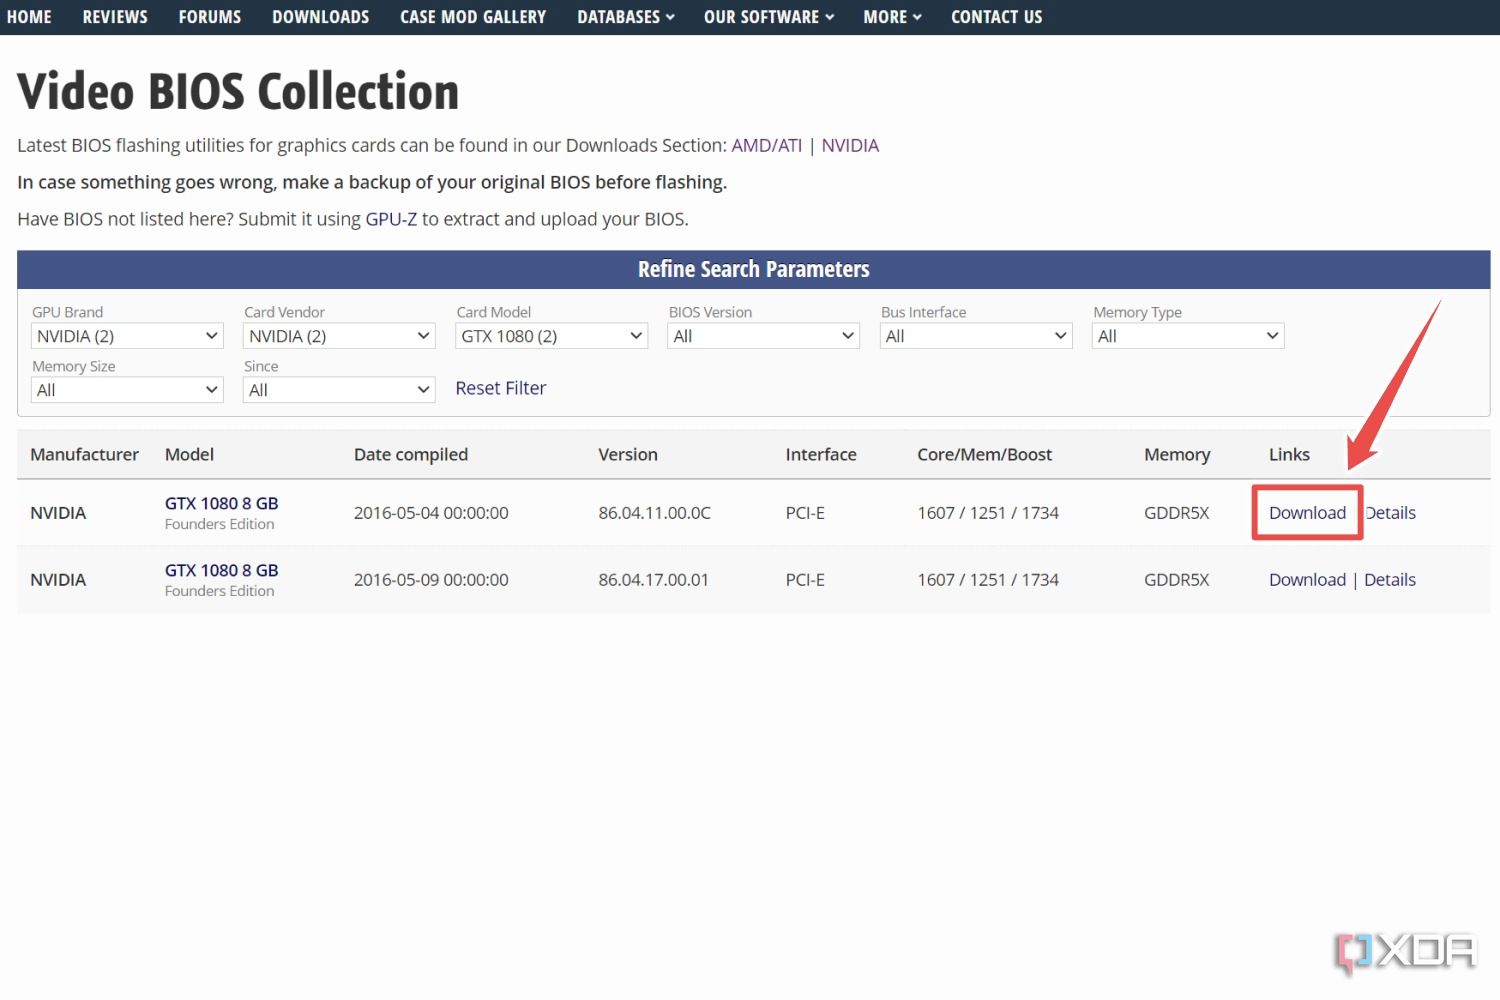
- Head to the Video BIOS Collection page on TechPowerUp.
- Note the card vendor, card model, bus interface, and other options from GPU-Z and use them to find the BIOS files compatible with your GPU on the Video BIOS Collection page.
- Once you’ve located the VBIOS file for your GPU, click the Download button next to it.
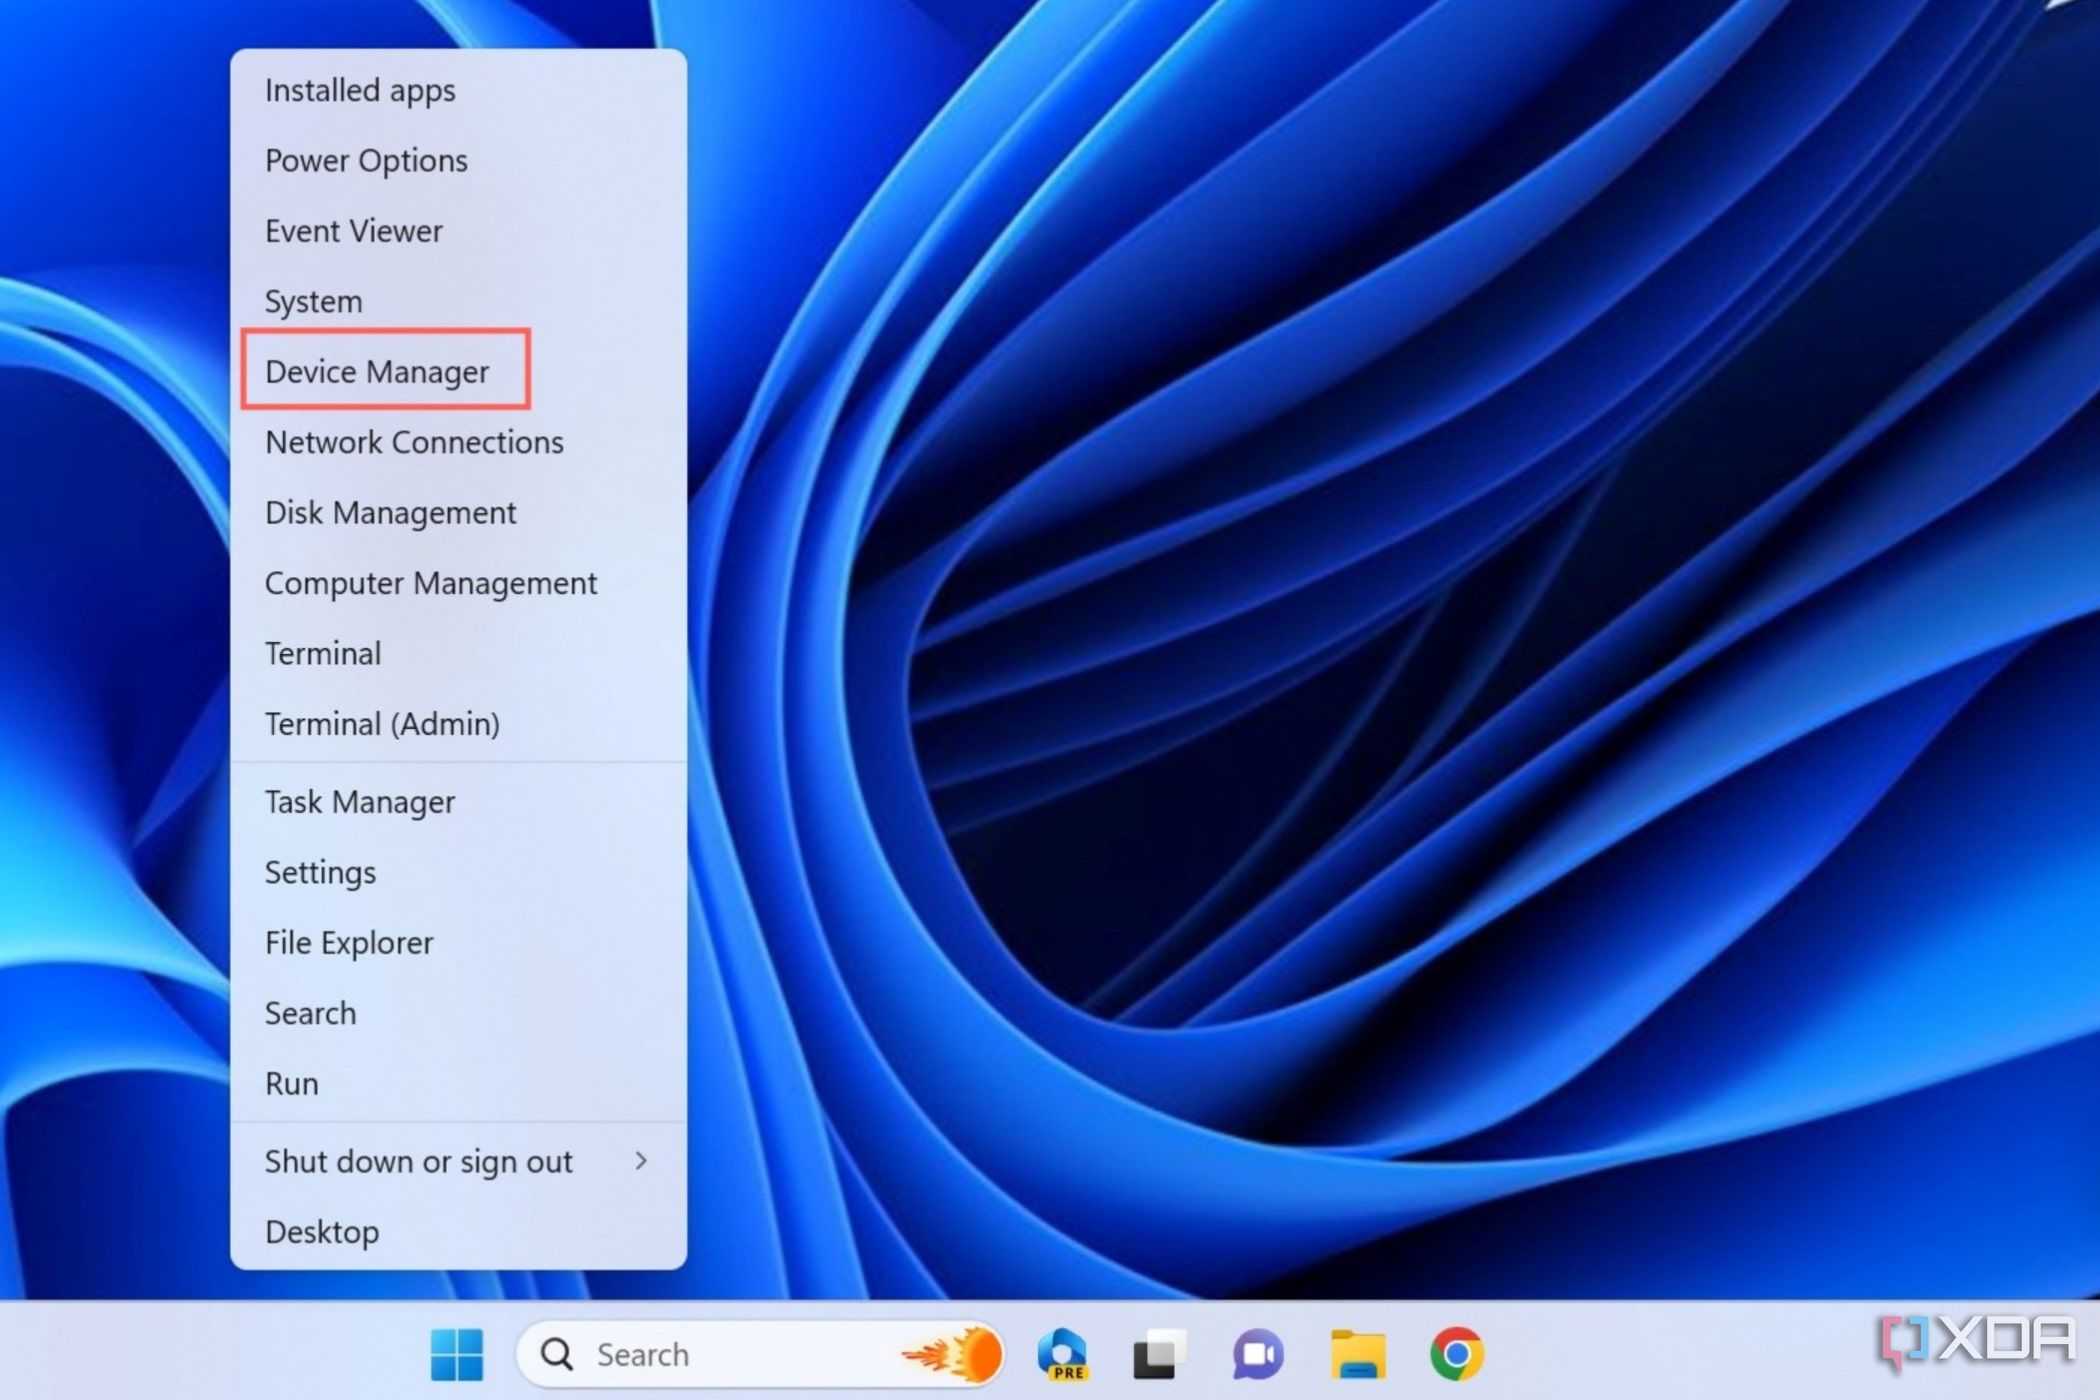
Next up, you should disable the GPU using the Device Manager. To do so,
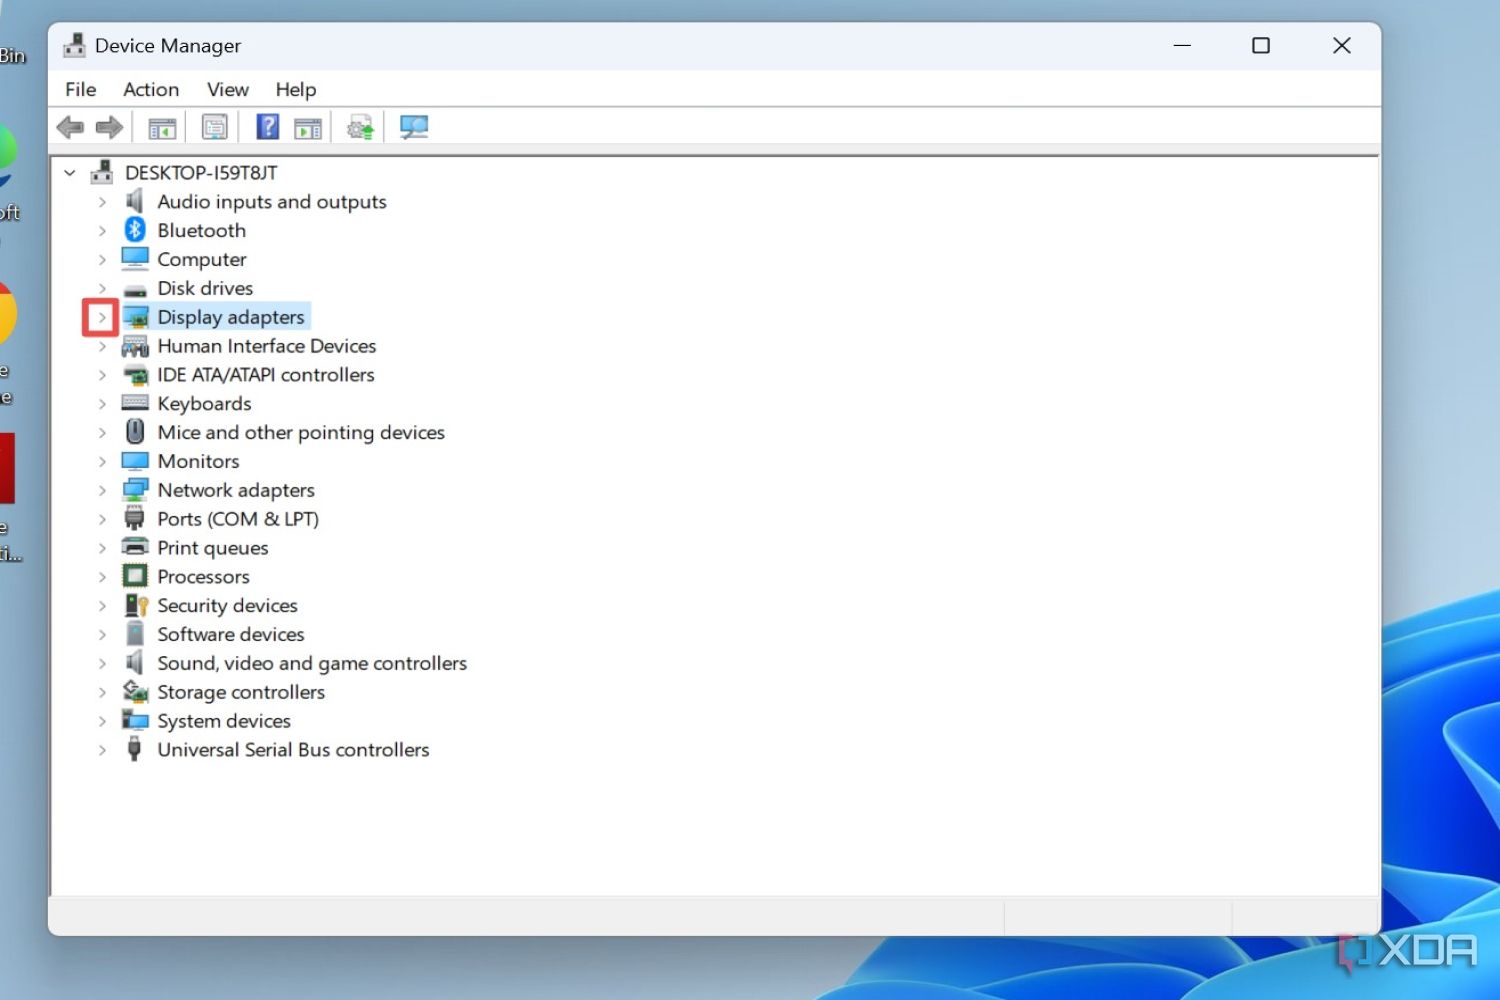
- Right-click on the Start button and choose Device Manager.
- Press the drop-down arrow adjacent to the Display adapters.
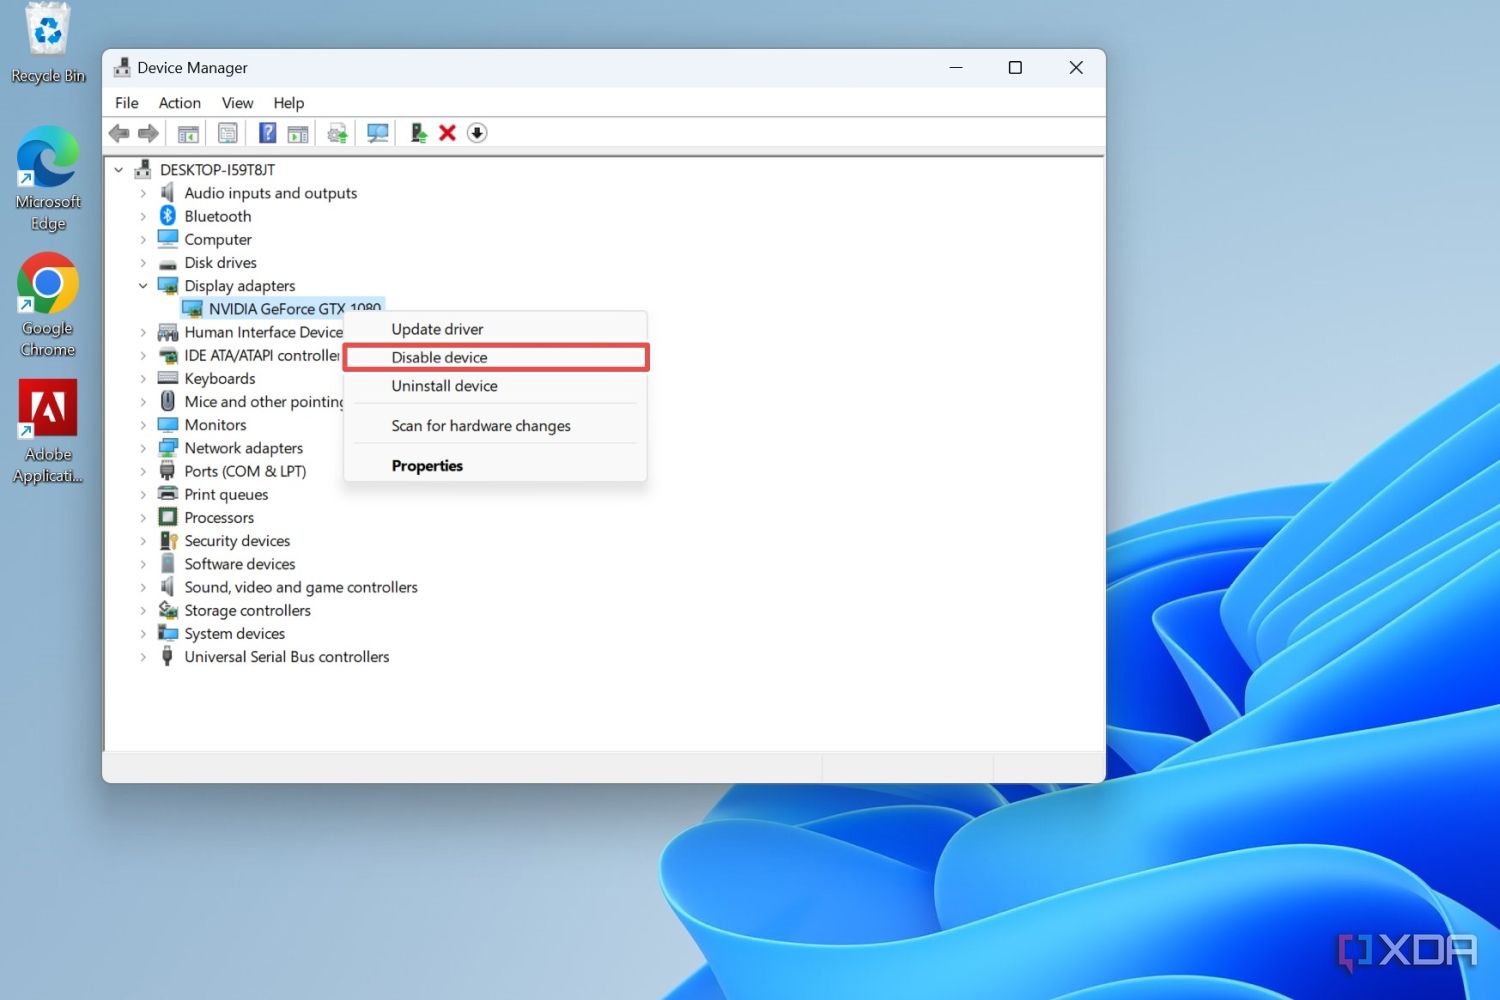
- Right-click on the faulty GPU and choose the Disable device option.
Depending on your GPU brand, you’ll need to install a different BIOS flashing utility. For Nvidia cards, it’s NVFlash, while AMD GPUs require AMDVBFlash.
Once you’ve extracted the tool, it’s time to flash the BIOS. Starting with Nvidia GPUs:
- Copy the VBIOS file you downloaded earlier into the NVFlash folder.
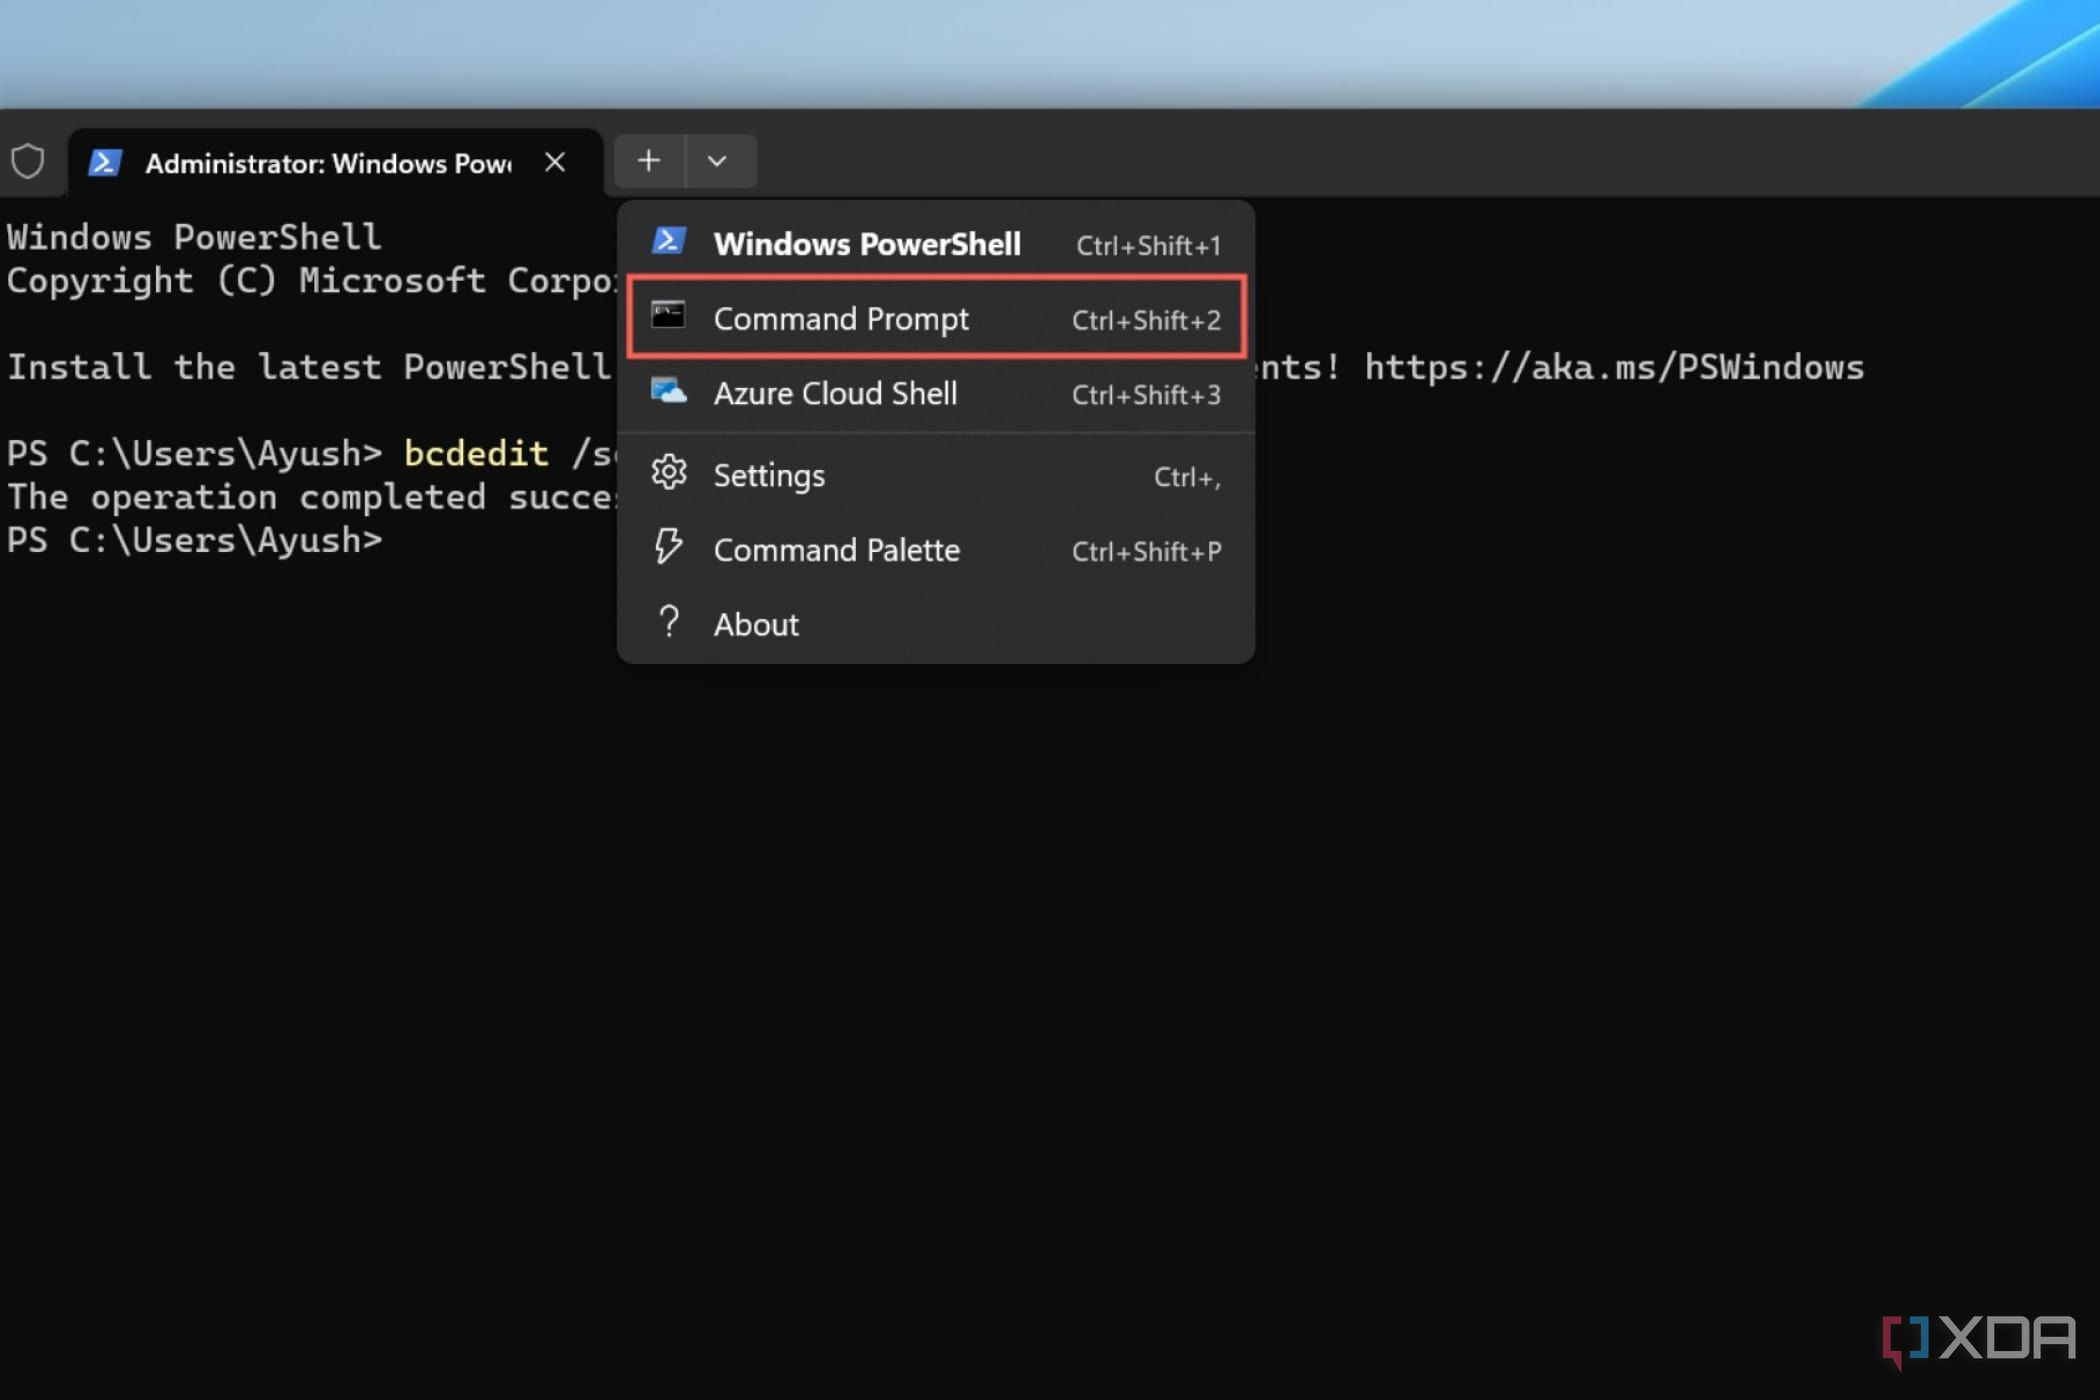
- Right-click on the Start button and open Terminal (Admin).

- Click on the drop-down arrow at the top of the window and switch to Command Prompt.
- Type cd followed by the directory where you unzipped the NVFlash folder.
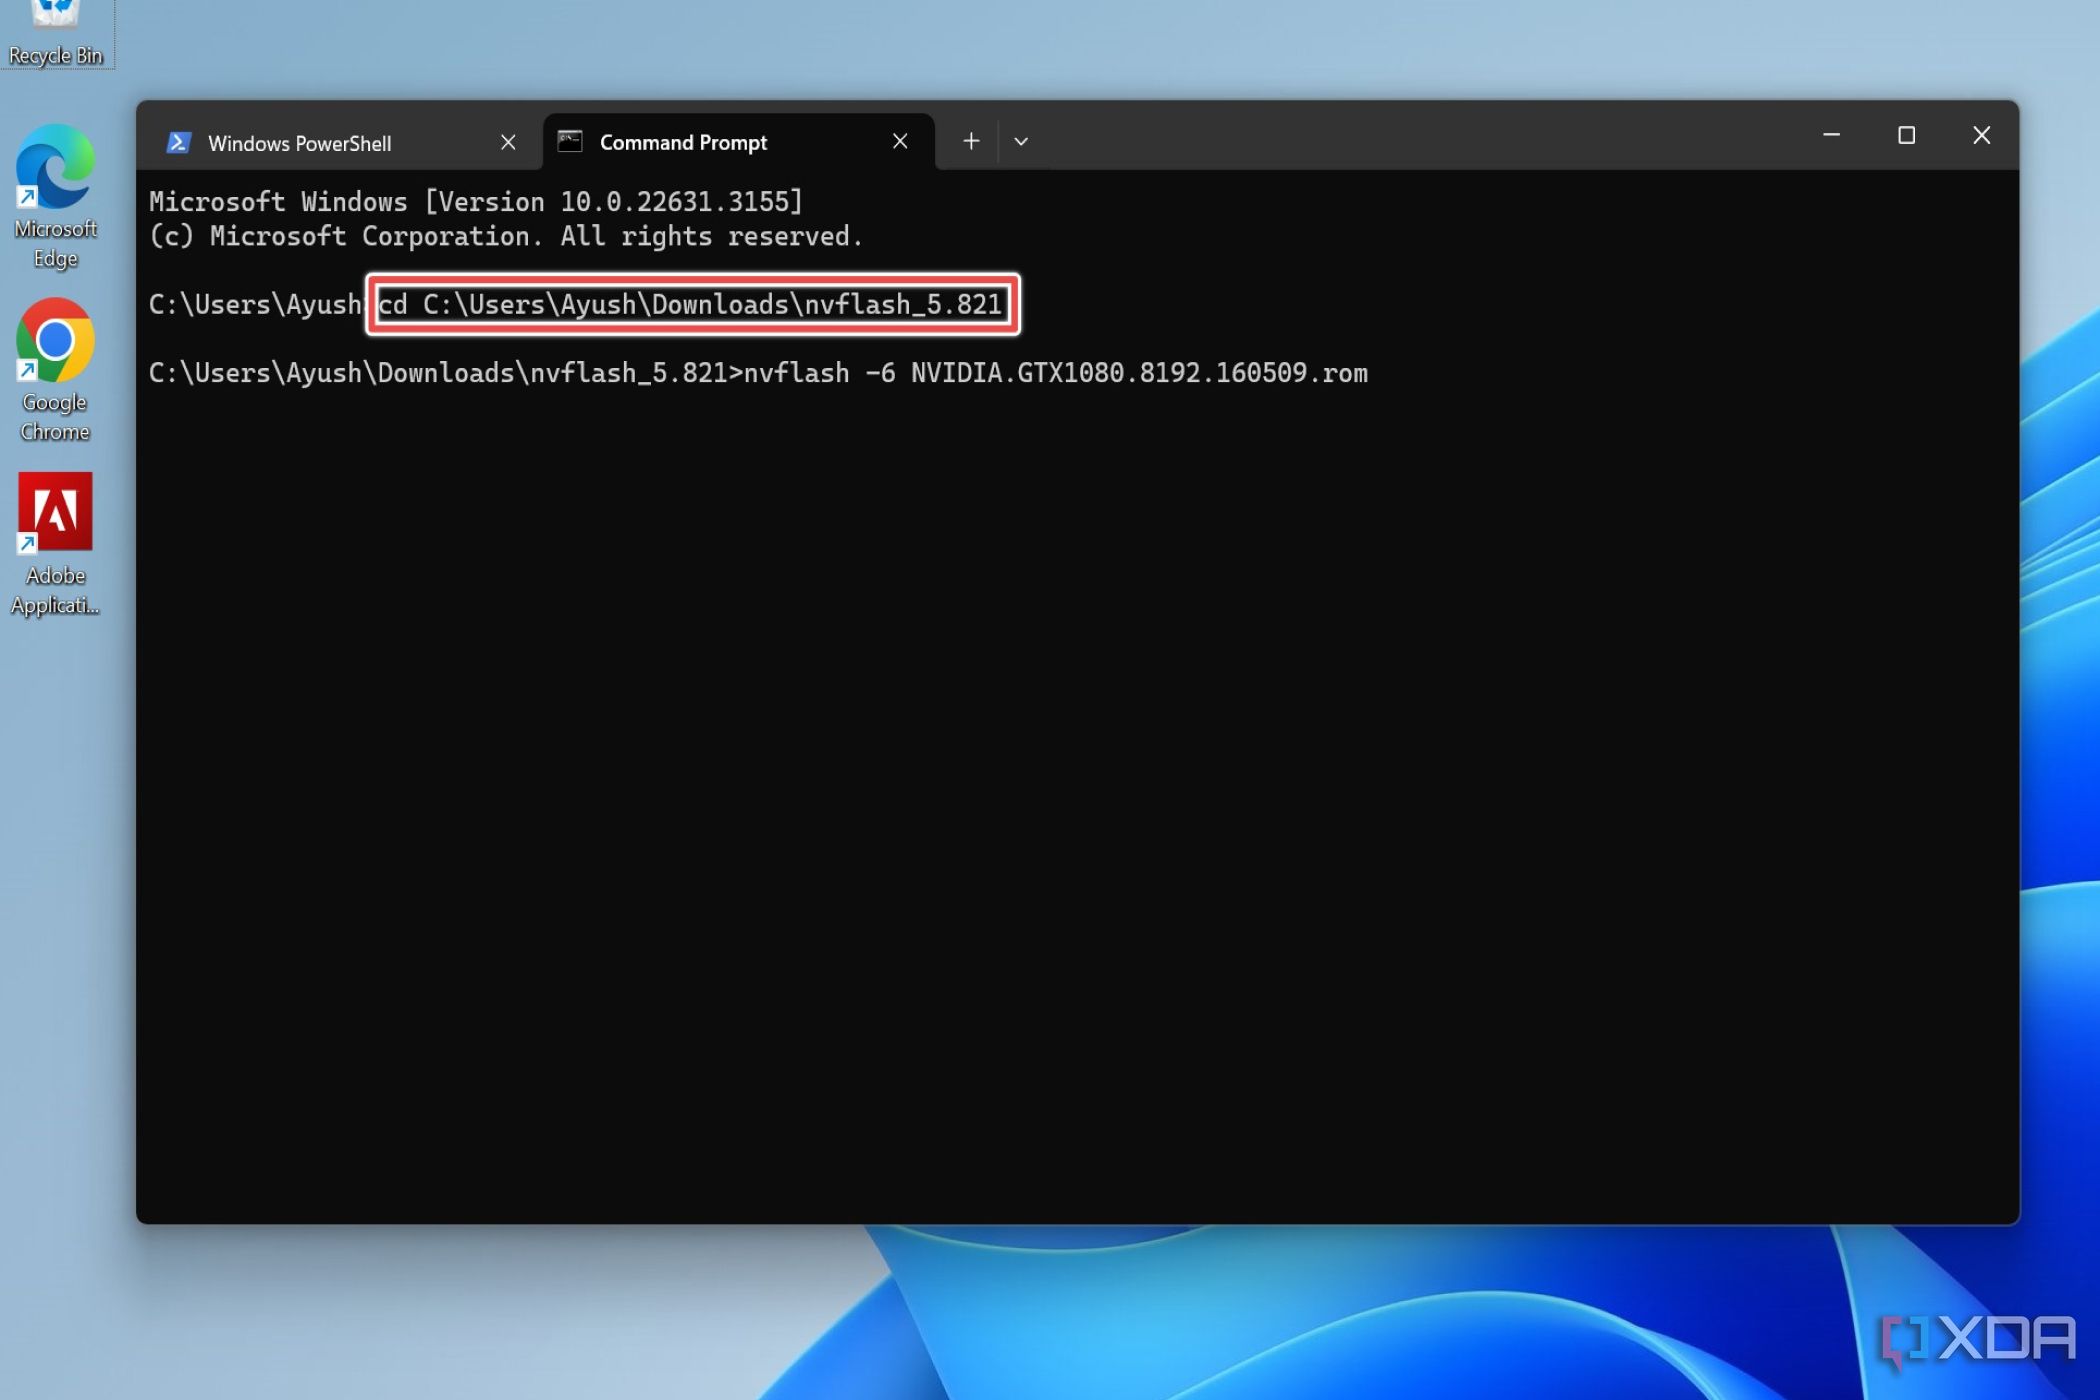
- Enter the following command:nvflash -6 bios_name
 Be sure to replace bios_name with the name of your GPU’s BIOS file.
 - NVFlash will ask for permission twice, and you’ll have to enter Y both times to initiate the flashing procedure.
- Restart your system after NVFlash flashes the new BIOS.
Continue Reading: XDA-Developers

Leave a reply